周六打的,全天都有考试,没想到中午回寝室做了下还拿了个血,还有个题差一点拿血,可惜了,可恶的考试!!!
Upper Tower
这个题拿三血~
题目给出两个文件:
1.png2.jpg
题目描述为“于高塔之巅,窥视寂静中的真相”,其中“寂静”暗示后续可能与 SilentEye 隐写有关。高塔UpperTower–》Tupper
解题过程
1. 从 1.png 提取密码
先对 1.png 做常规 LSB 检查。取蓝色通道最低位,按从左到右、从上到下读取,并按 MSB-first 拼成字节,可以得到一段很长的十进制数。
提取脚本如下:
from PIL import Image
import re

img = Image.open("1.png").convert("RGB")
w, h = img.size
pix = img.load()

bits = []
for y in range(h):
    for x in range(w):
        bits.append(pix[x, y][2] & 1)

data = bytearray()
for i in range(0, len(bits) // 8 * 8, 8):
    v = 0
    for b in bits[i:i + 8]:
        v = (v << 1) | b
    data.append(v)

m = re.search(rb"[0-9]{100,}", bytes(data))
num = int(m.group())
print(num)
print("num % 17 =", num % 17)
这段数字可以被 17 整除,因此想到 Tupper 自指公式。令:
k = num // 17再按 Tupper 公式渲染图像:
from PIL import Image
import math

W = math.ceil(k.bit_length() / 17)
H = 17

img = Image.new("1", (W, H), 0)
for x in range(W):
    for yy in range(H):
        bit = (k >> (17 * x + yy)) & 1
        img.putpixel((x, H - 1 - yy), 255 if bit else 0)

img.resize((W * 16, H * 16)).save("tupper.png")
(AI帮助)注意这里不能只按经典 Tupper 宽度 106 列渲染,因为本题实际需要 109 列。若只渲染 106 列,右侧最后一个字符会被截掉。
完整渲染后可读出:

所以密码为:
4thHHLY使用 SilentEye 解 2.jpg
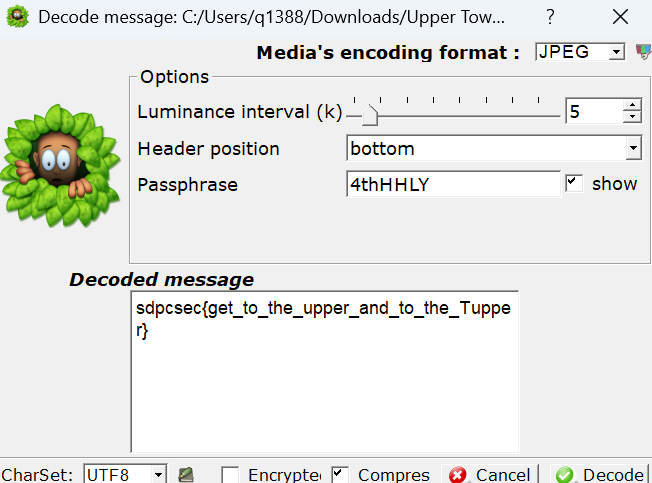
得到:sdpcsec{get_to_the_upper_and_to_the_Tupper}
encrypt
题目给了一个加密后的 3.png 和一个 Encrypt.exe。Encrypt.exe 是 PyInstaller 打包的 Python 程序,反编译后发现它对图片 RGB 三通道分别做 SRPM 置换;逆置换恢复原图后,再对单图做 FFT 幅度谱增强即可看到盲水印。
1: 逆向加密逻辑
先看 Encrypt.exe 字符串,能发现 PyInstaller、python313.dll 等特征。解包后主入口是 srpm_cli.py,真正的逻辑在 encrypt.py 和 srpm_utils.py。
核心置换函数如下:
def swap_target(index, length, round_index, channel_index):
    return (
        index * index
        + (2 * round_index + 3) * index
        + 7 * (channel_index + 1)
    ) % length
加密时会把每个通道展平成一维数组,然后每轮从前到后交换 i 和 swap_target(i, ...)。交换是可逆的,所以解密只要把轮数和下标顺序反过来。
题目文件名是 3.png,这里对应轮数 rounds = 3。如果用程序默认的 5 轮,恢复结果仍是噪声;用 3 轮可以还原出海边风景图。
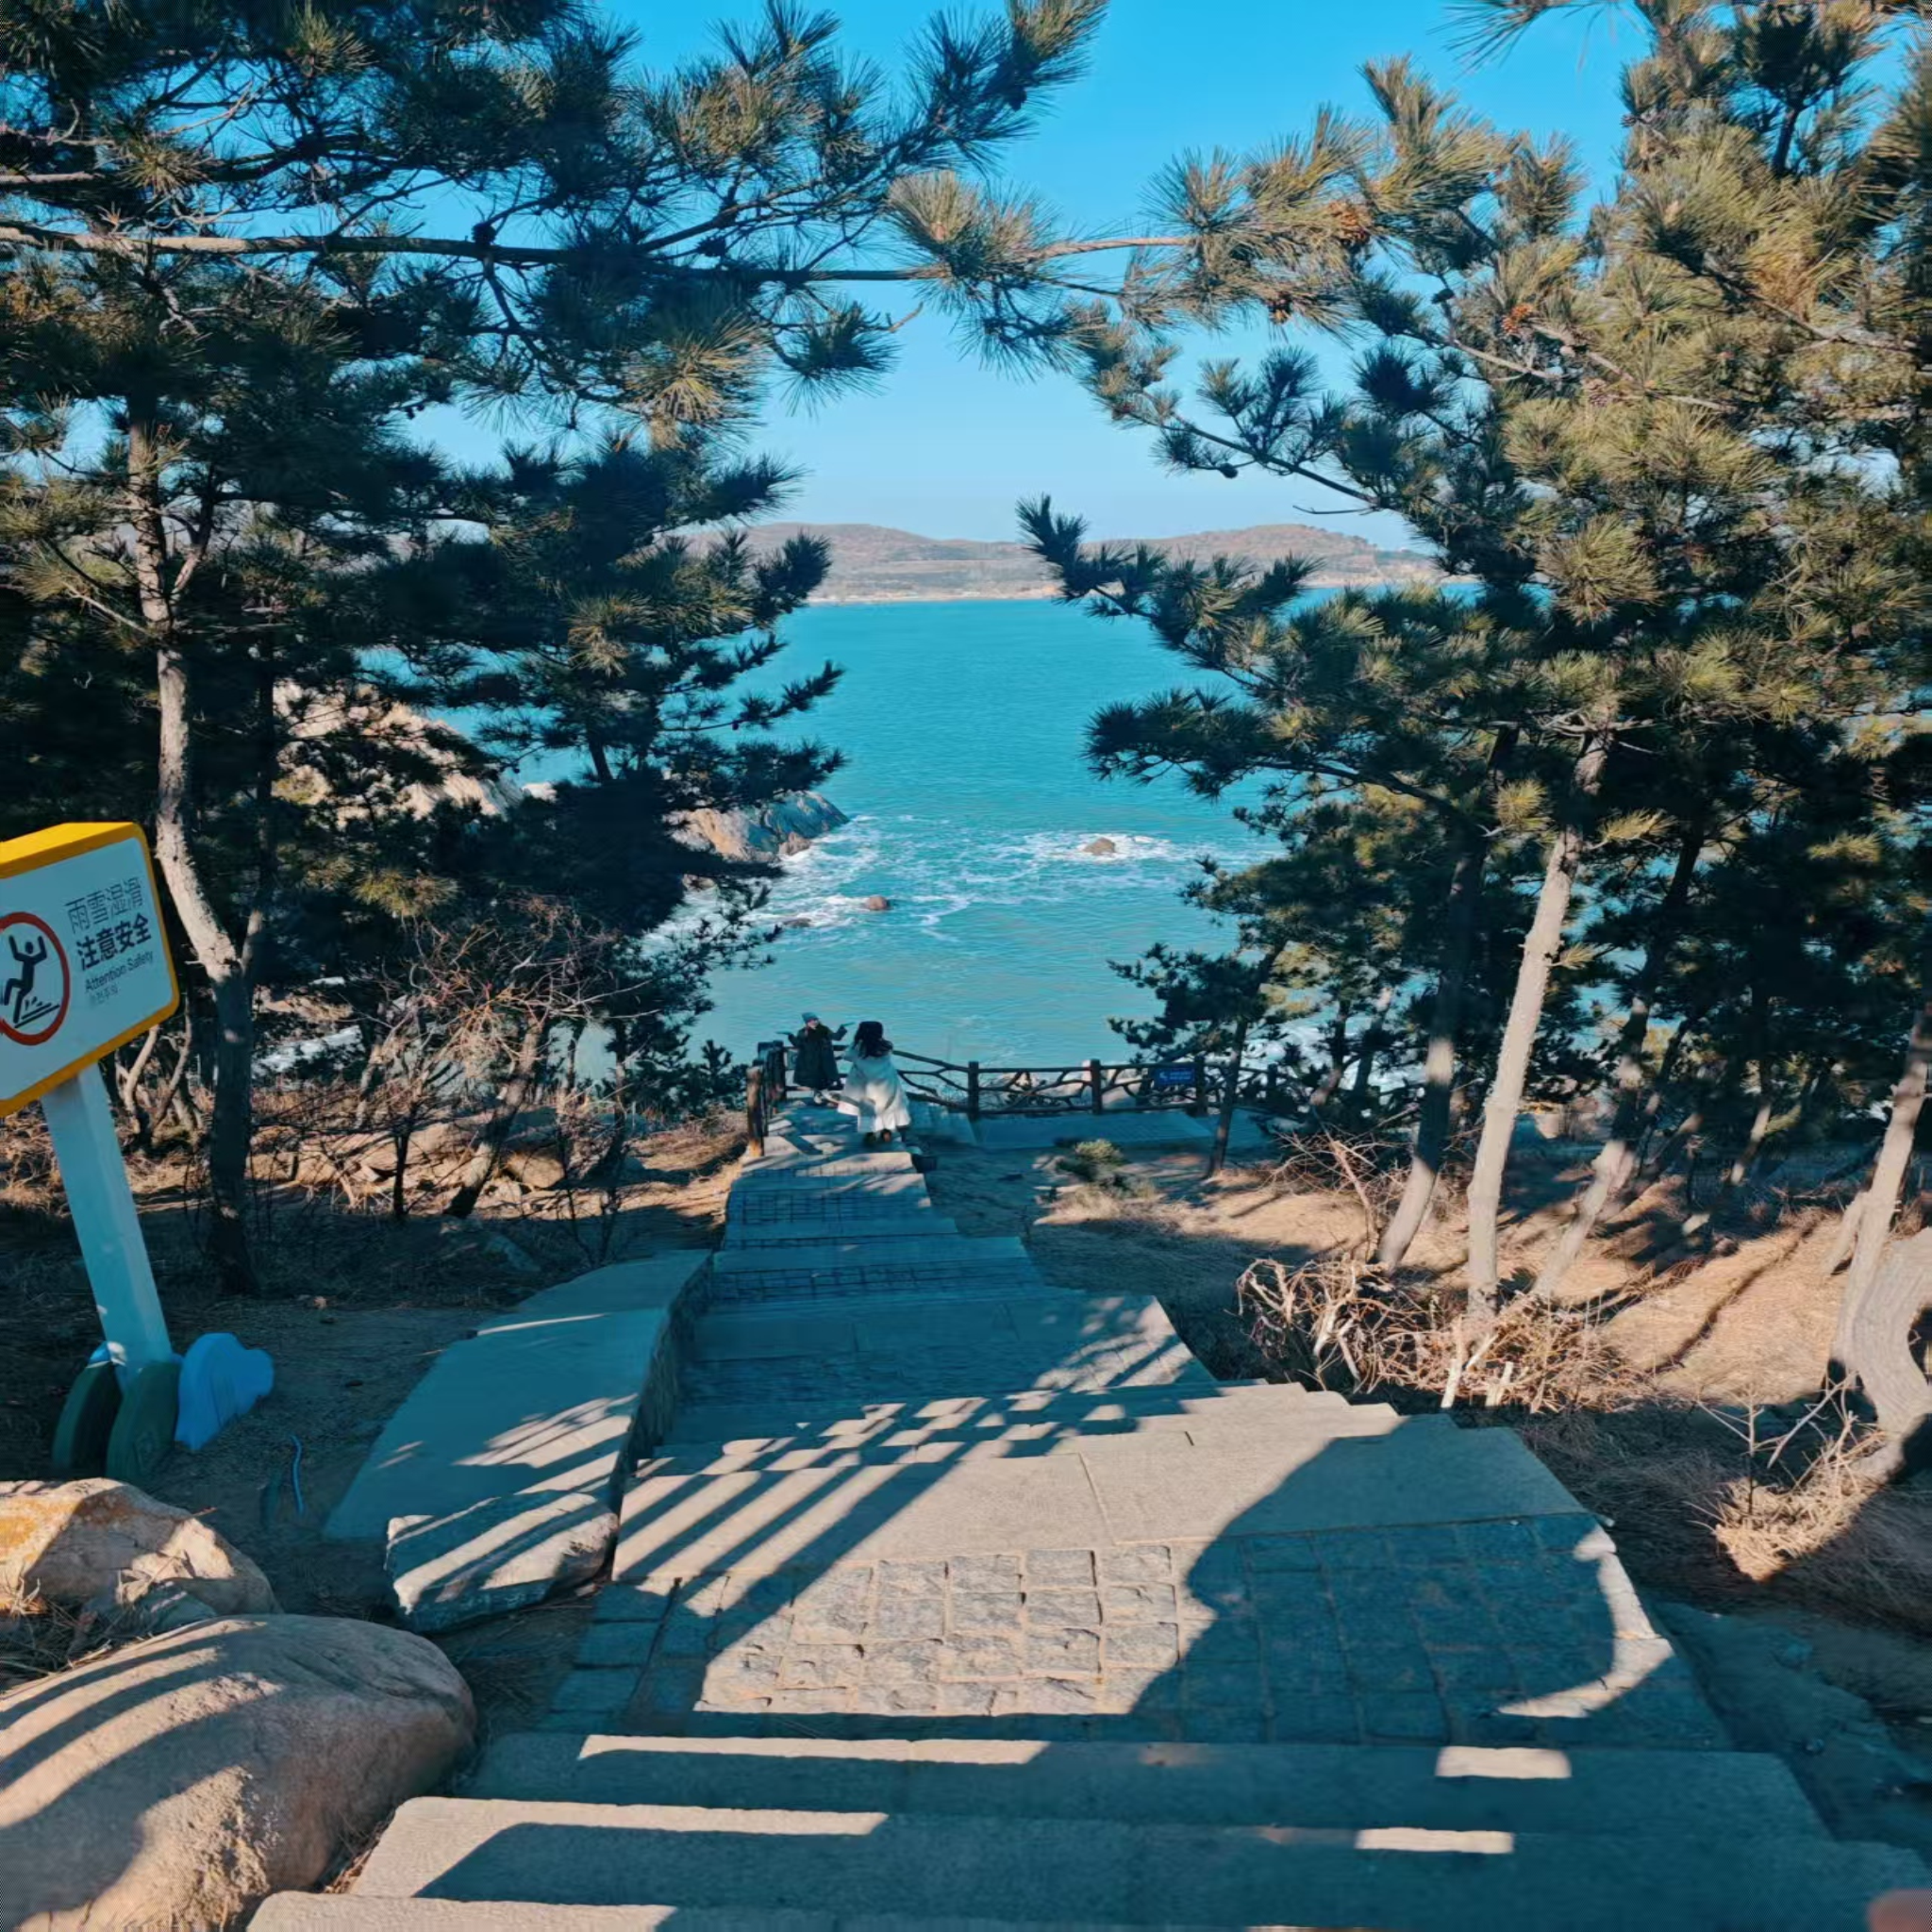
2: 单图盲水印
还原后的图片肉眼看不到 flag。继续做单图盲水印常规检查,对灰度图做二维 FFT,并显示中心化后的幅度谱:
import numpy as np
from PIL import Image, ImageOps

src = "restored.png"
gray = Image.open(src).convert("L")
arr = np.array(gray, dtype=np.float32)

freq = np.fft.fftshift(np.fft.fft2(arr))
mag = np.log1p(np.abs(freq))
mag = (mag - mag.min()) / (mag.max() - mag.min()) * 255

ImageOps.autocontrast(Image.fromarray(mag.astype(np.uint8))).save("watermark_fft.png")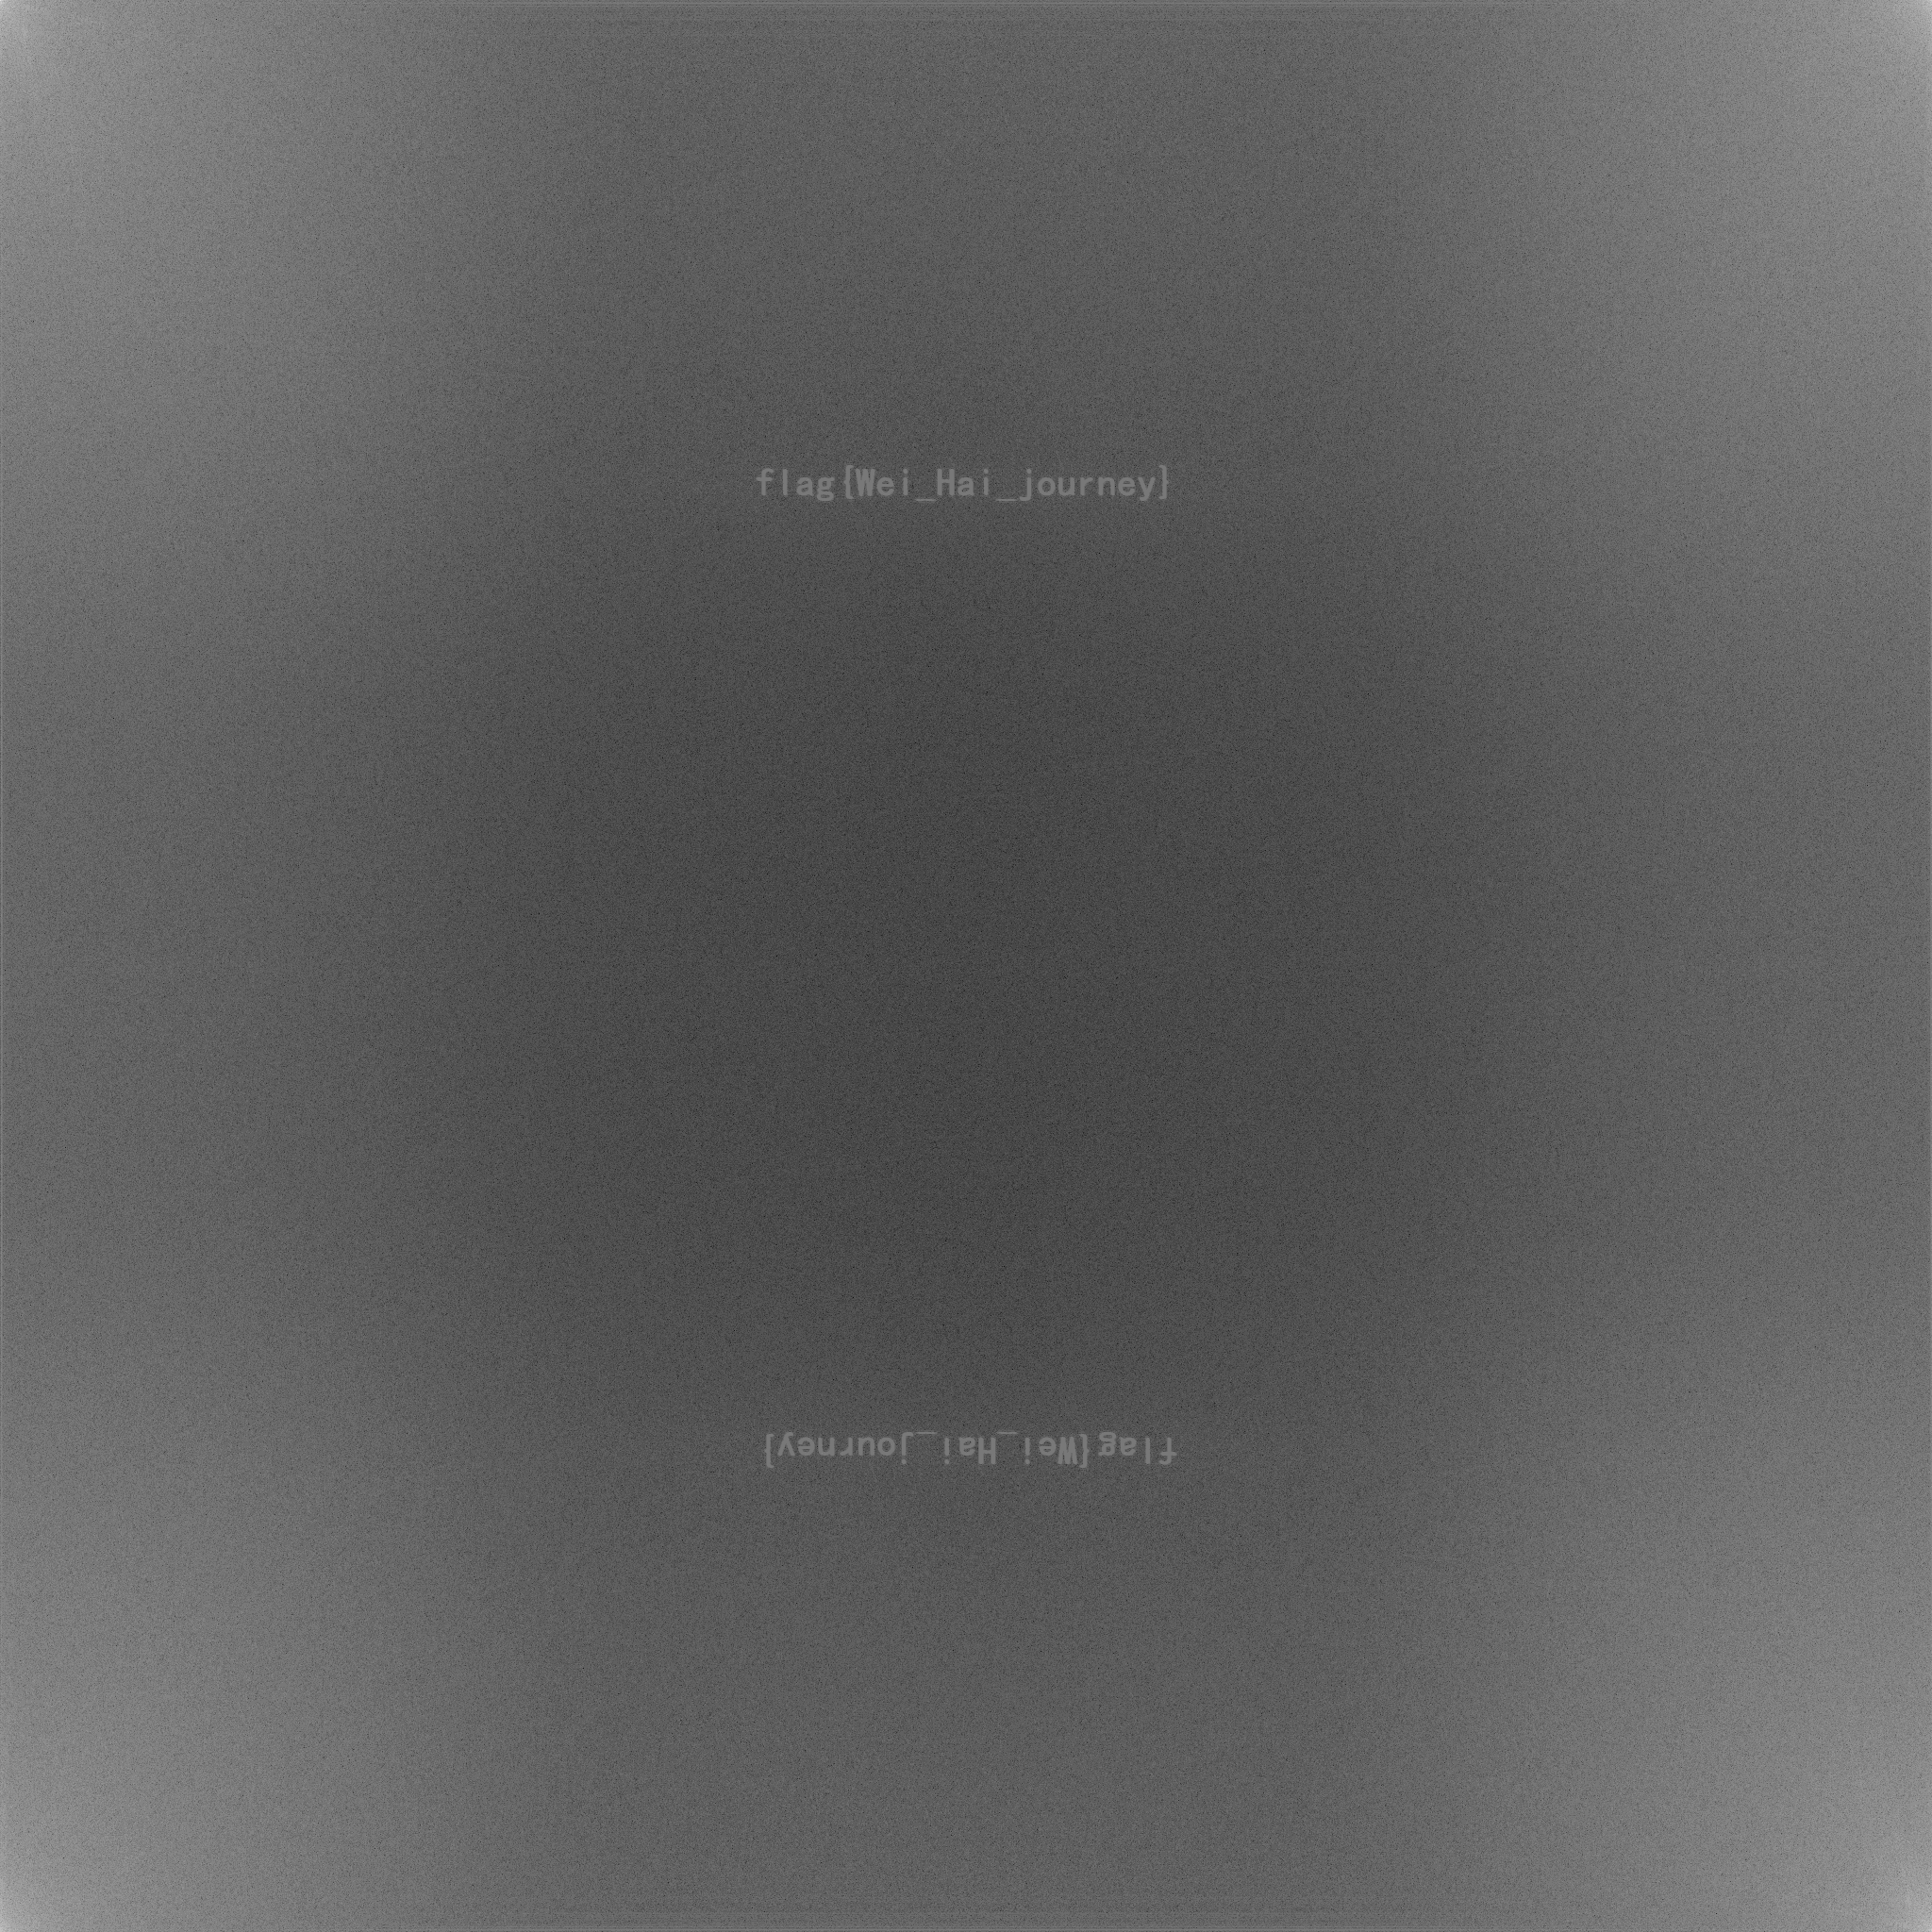
频谱图中间能看到水印文字,同时在下方有一份中心对称的倒置副本:
flag{Wei_Hai_journey}Solve Script
from pathlib import Path

import numpy as np
from PIL import Image, ImageOps


INPUT = Path("3.png")
RESTORED = Path("restored.png")
FFT_OUT = Path("watermark_fft.png")
ROUNDS = 3


def swap_target(index: int, length: int, round_index: int, channel_index: int) -> int:
    return (
        index * index
        + (2 * round_index + 3) * index
        + 7 * (channel_index + 1)
    ) % length


def restore_image(path: Path, rounds: int) -> Image.Image:
    img = Image.open(path).convert("RGB")
    width, height = img.size
    raw = img.tobytes()
    length = width * height

    channels = [bytearray(raw[channel::3]) for channel in range(3)]

    for channel_index, values in enumerate(channels):
        for round_index in range(rounds - 1, -1, -1):
            for index in range(length - 1, -1, -1):
                target = swap_target(index, length, round_index, channel_index)
                values[index], values[target] = values[target], values[index]

    merged = bytearray(len(raw))
    merged[0::3] = channels[0]
    merged[1::3] = channels[1]
    merged[2::3] = channels[2]
    return Image.frombytes("RGB", (width, height), bytes(merged))


def extract_fft_watermark(img: Image.Image) -> Image.Image:
    gray = img.convert("L")
    arr = np.array(gray, dtype=np.float32)
    freq = np.fft.fftshift(np.fft.fft2(arr))
    mag = np.log1p(np.abs(freq))
    mag = (mag - mag.min()) / (mag.max() - mag.min()) * 255
    return ImageOps.autocontrast(Image.fromarray(mag.astype(np.uint8)))


restored = restore_image(INPUT, ROUNDS)
restored.save(RESTORED)

fft_img = extract_fft_watermark(restored)
fft_img.save(FFT_OUT)

print(f"[+] restored image written to {RESTORED}")
print(f"[+] FFT watermark image written to {FFT_OUT}")
print("[+] flag: flag{Wei_Hai_journey}")
得到Flag
flag{Wei_Hai_journey}signin?
题目给出一段看起来像 AI 回复的中文长文本,语义上不断提示“不要精读内容,要看形式”。真正的信息藏在中文标点里:将 ,。;: 视为四进制数字,每 4 个标点还原 1 个字节即可得到 flag。
1: 观察异常结构
文本内容大量重复,且每段都在强调“异常结构”“标点习惯”“外观层而不是语义层”。统计后发现有效标点只出现 4 种:
, 。 ; :这 4 种符号非常适合映射为四进制数字。全文中这 4 类标点共 148 个,148 / 4 = 37,刚好可以按每 4 个四进制位还原 1 个字节。
2: 四进制解码
映射关系如下:
, = 0
。 = 1
; = 2
: = 3
完整解码脚本:
from pathlib import Path

path = Path("ai_reply.txt")
text = path.read_text(encoding="utf-8")

alphabet = ",。;:"
seq = "".join(ch for ch in text if ch in alphabet)

out = bytearray()
for i in range(0, len(seq), 4):
    chunk = seq[i:i + 4]
    if len(chunk) < 4:
        break

    value = 0
    for ch in chunk:
        value = value * 4 + alphabet.index(ch)
    out.append(value)

print(out.decode("ascii"))
运行结果:
sdpcsec{welcome_2026_4nd_competiton!}Cake
题目文件
附件中有两个关键文件: cake_base.bin与 cake_knife.txt
cake_knife.txt 内容如下: 0xb47e923c 0x5aeb49a7 0xa3cd7af0
一开始可以尝试 file、binwalk、strings 等常规 misc手段,但 cake_base.bin 看起来不像普通图片、压缩包或可直接识别的容器。
关键观察
cake_knife.txt 中有三个 32-bit 十六进制数。经典 ZIP 加密 ZipCrypto内部正好维护三个 key:
    key0
    key1
    key2
所以这里的 “knife” 不是 ZIP 密码,而是直接给出了 ZipCrypto 的内部密钥状态。将这三个值作为初始 key state,对 cake_base.bin 做 ZipCrypto 流解密。
解密后文件头变成:50 4b 03 04
也就是 ZIP 文件头 PK\x03\x04。
第一层解密脚本
核心逻辑如下:
    def crc32_byte(old: int, b: int) -> int:
        return ((old >> 8) ^ CRC_TABLE[(old ^ b) & 0xff]) & 0xffffffff


    def decrypt_zipcrypto_state(data: bytes, key0: int, key1: int, key2: int) -> bytes:
        out = bytearray()
        for c in data:
            t = (key2 | 2) & 0xffffffff
            k = ((t * (t ^ 1)) >> 8) & 0xff
            p = c ^ k
            out.append(p)

            key0 = crc32_byte(key0, p)
            key1 = (key1 + (key0 & 0xff)) & 0xffffffff
            key1 = (key1 * 134775813 + 1) & 0xffffffff
            key2 = crc32_byte(key2, (key1 >> 24) & 0xff)

        return bytes(out)
输出: work\cake_repro\cake_stage1.zip

第一层结果
解出的 ZIP 可以正常解压,包含:
    fruit.bin
    scream.avi
    instruction.txt
其中 instruction.txt 内容为:
passwd:2a815f7fc358b2b60800add58f389af27e03009d1ec97f7e5844e2fb99a692b9c0532514fc0dada7ee57b158dd86ee1d997953731798c79677a55c5728891f82scream.avi 是一个 FFV1 编码的视频,画面中有蛋糕和提示文字:
    Raspberry's Big Cake
    Celebrate with a secret recipe...
fruit.bin 高熵,无明显文件头或字符串。
第二层:固定像素点跨帧取值
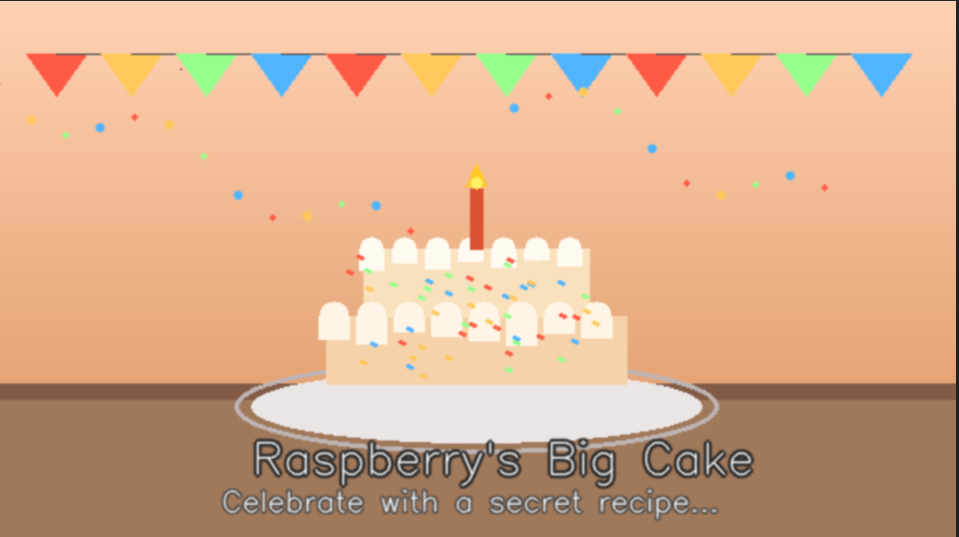
检查 scream.avi 时,
发现有一些像素逐帧发生了改变,但是不确定读哪一个坐标,所以进行了遍历
直接遍历所有坐标,然后检查 RGB 三个通道中是否存在可打印 ASCII 字符
需要注意,OpenCV 读取图片时默认通道顺序是 BGR,因此脚本中需要转成 RGB 或者直接遍历三个通道。
import cv2

cap = cv2.VideoCapture("scream.avi")

frames = []
while True:
    ret, frame = cap.read()
    if not ret:
        break
    frames.append(frame)

cap.release()

h, w = frames[0].shape[:2]

for y in range(h):
    for x in range(w):
        s = ""

        for frame in frames:
            b, g, r = frame[y, x]

            # OpenCV 默认是 BGR,这里按 RGB 顺序检查
            for v in [r, g, b]:
                v = int(v)
                if 32 <= v <= 126:
                    s += chr(v)

        if "flag{" in s:
            print(x, y, s)
定位到像素点: x = 123 y = 45
将视频解码成 BGRA 原始帧后,查看这个点在前几帧的像素值:
    frame 1:  B=0    G=0    R=102  -> f
    frame 2:  B=0    G=108  R=0    -> l
    frame 3:  B=97   G=0    R=0    -> a
    frame 4:  B=0    G=0    R=103  -> g
    frame 5:  B=0    G=123  R=0    -> {
    frame 6:  B=87   G=0    R=0    -> W
可以看到它不是普通 LSB,而是 RGB 通道值本身就是 ASCII。通道顺序为: R, G, B, R, G, B, …
所以按帧读取:
    x, y = 123, 45
    bgra_offsets = [2, 1, 0]  # R, G, B in BGRA rawvideo

    chars = []
    for i in range(96):
        off = i * frame_size + (y * width + x) * 4 + bgra_offsets[i % 3]
        ch = chr(data[off])
        chars.append(ch)
        if ch == "}":
            break

    print("".join(chars))
输出: flag{W0w_d3lici0us_c4ke!!}
鲨士比亚王国的金融危机
题目给了两张图片:flag.png 和 SCB.png。SCB.png 看起来只是写着 SCB 的提示图,但它的白色像素数量刚好等于 flag.png 的总像素数,因此真正做法是把 flag.png 的像素按中心螺旋顺序取出,再填入 SCB.png 的白色位置,最终显出 flag。
1: 观察图片尺寸和像素数量
flag.png 的尺寸是 889 x 889,总像素数为:
889 * 889 = 790321SCB.png 的尺寸是 2587 x 307,其中黑色像素组成 SCB 三个字母,白色背景像素数量也正好是 790321。
这说明 SCB.png 不是单纯的提示图,而是一个模板:flag.png 的所有像素可以刚好填入它的白色区域。
2: 按中心螺旋顺序填充模板
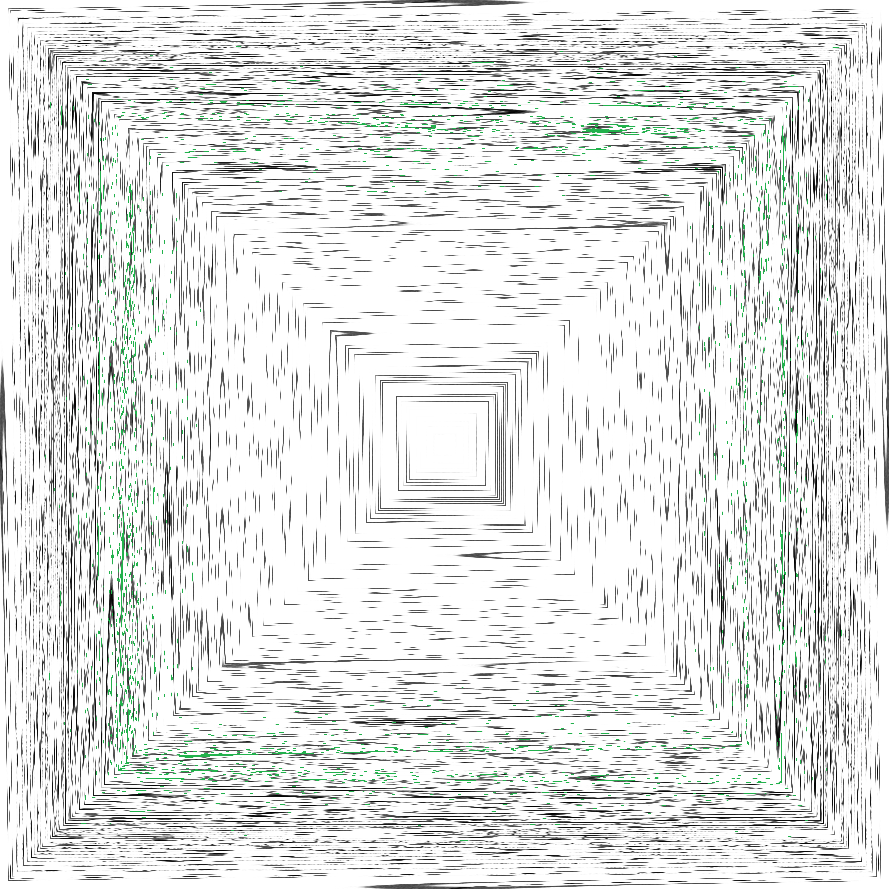
SCB 可理解为 Spiral Center Begin,提示从中心开始走螺旋。对 flag.png 从中心点开始,按照 右 -> 下 -> 左 -> 上 的方向不断扩大螺旋读取像素,然后按行优先顺序填入 SCB.png 的白色像素位置。
完整脚本如下:
from pathlib import Path

import numpy as np
from PIL import Image


BASE = Path(r"C:\Users\q1388\Downloads\flag(1)")
OUT = Path("recovered_flag.png")
CLEAN_OUT = Path("recovered_flag_clean.png")


def center_spiral(n):
    x = y = n // 2
    coords = [(y, x)]
    dirs = [(1, 0), (0, 1), (-1, 0), (0, -1)]  # R, D, L, U
    step = 1
    d = 0

    while len(coords) < n * n:
        for _ in range(2):
            dx, dy = dirs[d % 4]
            for _ in range(step):
                x += dx
                y += dy
                if 0 <= x < n and 0 <= y < n:
                    coords.append((y, x))
                    if len(coords) == n * n:
                        return coords
            d += 1
        step += 1

    return coords


flag_img = Image.open(BASE / "flag.png").convert("RGB")
scb_img = Image.open(BASE / "SCB.png").convert("RGB")

flag = np.array(flag_img)
scb = np.array(scb_img)

n = flag_img.width
assert flag_img.size == (n, n)

white = (scb[:, :, 0] > 128) & (scb[:, :, 1] > 128) & (scb[:, :, 2] > 128)
assert white.sum() == n * n

coords = center_spiral(n)
ys = [y for y, _ in coords]
xs = [x for _, x in coords]
spiral_pixels = flag[ys, xs]

recovered = scb.copy()
recovered[white] = spiral_pixels
Image.fromarray(recovered).save(OUT)

# 可选:只保留绿色手写 flag 和黑色 SCB,方便阅读
r = recovered[:, :, 0].astype(int)
g = recovered[:, :, 1].astype(int)
b = recovered[:, :, 2].astype(int)
green = (g > r + 25) & (g > b + 5) & (g > 90) & (r < 230) & (b < 230)
scb_black = ~white

clean = np.full_like(recovered, 255)
clean[green] = [34, 177, 76]
clean[scb_black] = [0, 0, 0]
Image.fromarray(clean).save(CLEAN_OUT)

print("flag{You_saved_SCB_by_the_coin}")
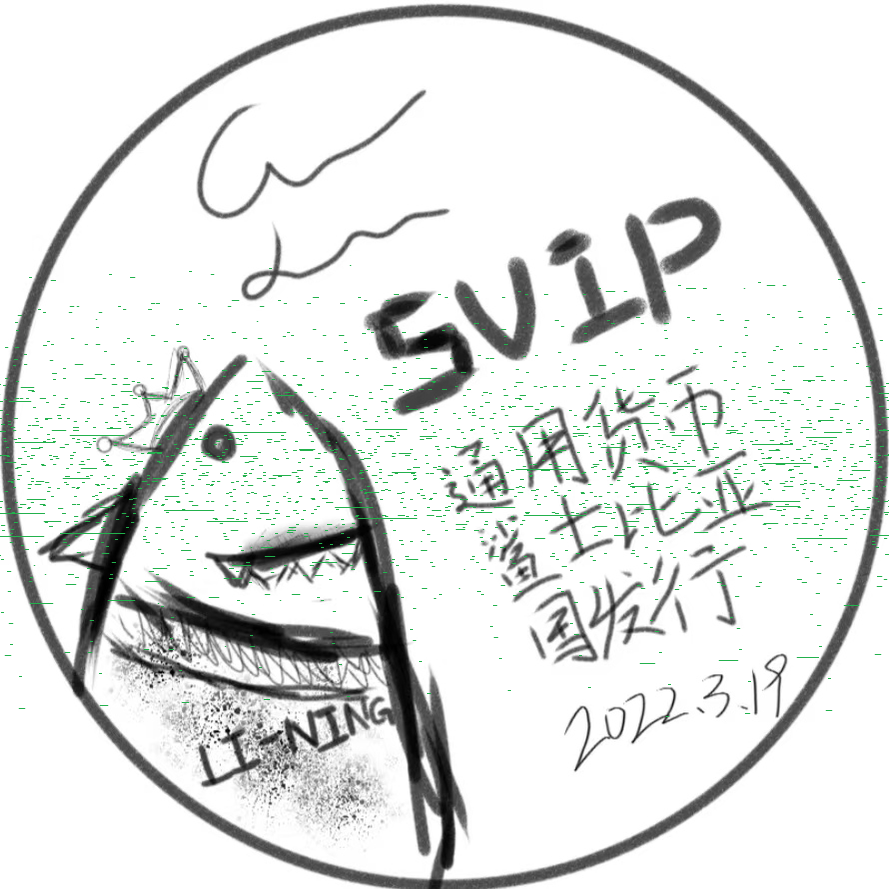
运行后会生成 recovered_flag.png 和更易读的 recovered_flag_clean.png。图中绿色手写内容为:

recovered_flag_clean.pngflag{You_saved_SCB_by_the_coin}AD ASTRA
题目给出一段 WAV 和一个伪装成 PNG 的文件。flag.png 实际是 WebP + ZIP overlay,解出一张提示图;AD ASTRA.wav 使用 DeepSound 隐写得到一个二次加密的 Office 文档,爆破 Office 2013 Agile 加密密码 skadi2530 后,最终 flag 藏在 Word 的隐藏文本中。
1. 分析 flag.png
首先检查 flag.png 文件头,发现它不是 PNG,而是 WebP:
RIFF .... WEBP VP8X继续检查文件尾部,发现 WebP 正常数据结束后拼接了一个 ZIP。切出 overlay 后解压,得到 01.txt 到 09.txt。这些文本都是 Base64 片段,按顺序拼接后解码得到一张真正的 PNG。
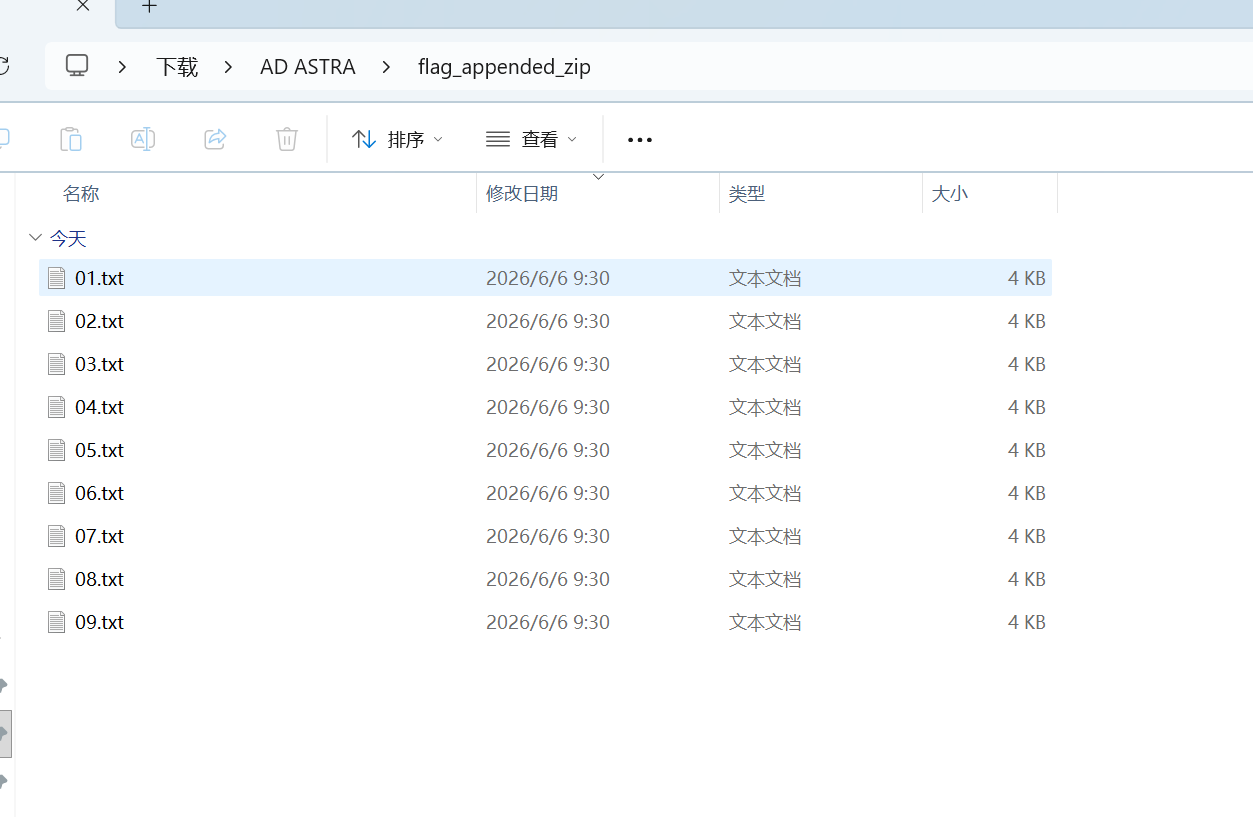
还原出的图片上有两行提示:
To the stars
we come from
这一步说明 flag.png 是诱导继续找密码/线索的提示文件。
2. 提取 WAV 中的 DeepSound 载荷
AD ASTRA.wav 是 48 kHz、stereo、16-bit PCM。DeepSound 通常把数据藏在音频采样的低 bit 中。提取每个 16-bit sample 的低 4 bit,按 nibble 拼接后可以得到 DeepSound 头:
44 53 43 32 ...
DSC2
用 DeepSound 工具/脚本从音频中提取隐藏文件,得到:
flag.docx3. 识别 flag.docx 的真实结构
虽然文件名是 .docx,但文件头不是 ZIP:
D0 CF 11 E0 A1 B1 1A E14、Passkit爆破
爆破了很久,搞出来密码是:
skadi25305、得到flag
打开后里面有张图片,图片背后就是flag
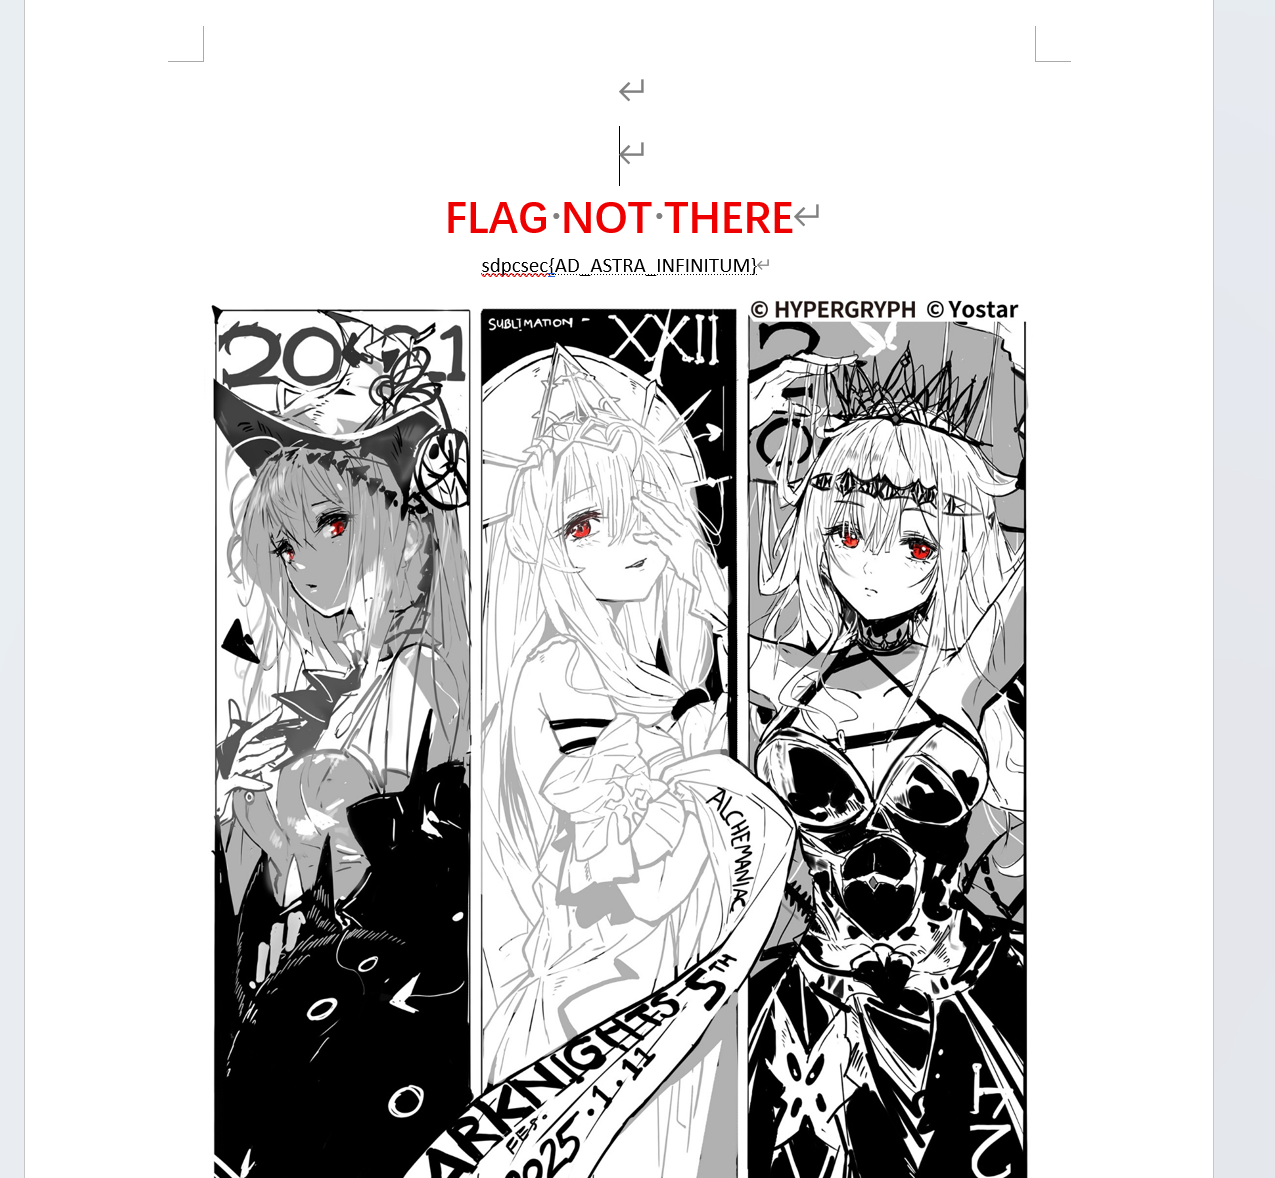
Do you know RA2?(压轴)
感谢Alexander大佬的帮助
给了三个文件:

简报.txt 的题面反复提到红警 2、黑森林、爱因斯坦实验室和“幻影坦克”。其中“电台发送”提示先看音频,“幻影坦克”后面对应图片里的 Mirage / Cloak 伪装图。盟军战车工厂 没有扩展名,开头也没有常见文件头,整体表现为高熵随机数据,考虑是否为加密容器。总部发来的讯息听着很像SSTV慢扫
一、Wav文件
SSTV慢扫:
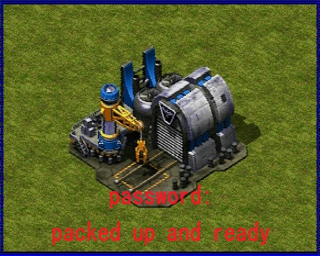
得到packed up and ready
二、VeraCrypt 容器(第一次)
用得到的packed up and ready为密码挂载盟军战车工厂
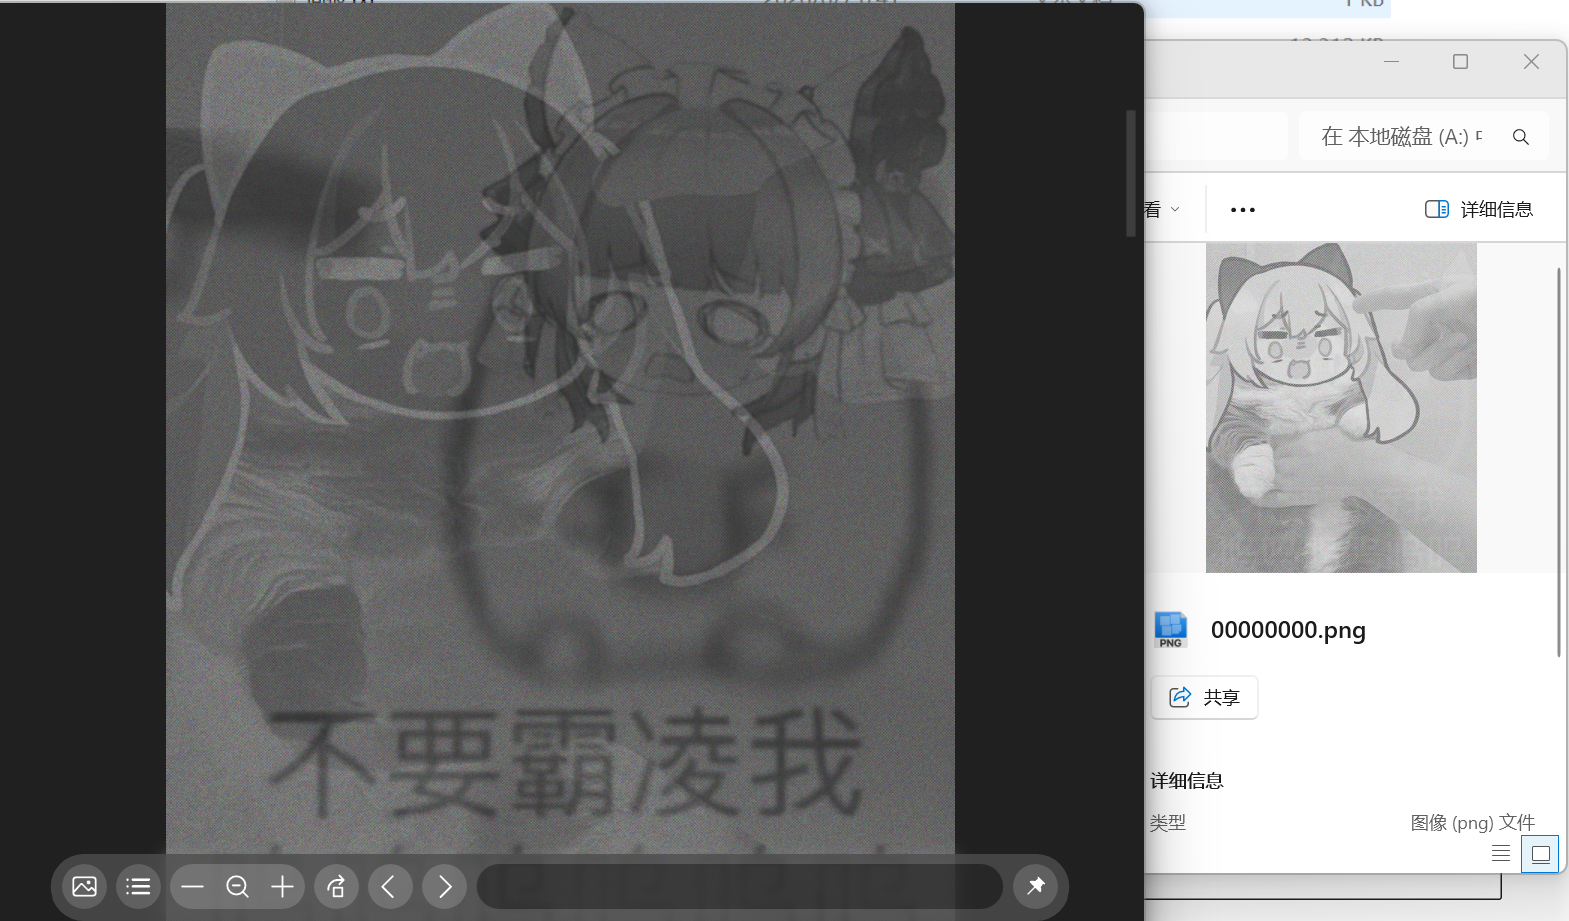
得到的(00000000.png)图片很有意思,这个在展示界面只有一部分,单独打开却可以看到截然不同的画面(与下面的隐写有关)
三、幻影坦克 / Mirage_Cloak 棋盘隐写
https://github.com/TankFactory/Mirage_Cloak
题面里的“幻影坦克”是关键提示。
分别合成黑底和白底:(用Stegsolve也可以)
from PIL import Image
im = Image.open("00000000.png").convert("RGBA")

for name, color in [("black", (0, 0, 0, 255)), ("white", (255, 255, 255, 255))]:
    bg = Image.new("RGBA", im.size, color)
    bg.alpha_composite(im)
    bg.convert("RGB").save(f"mirage_{name}.png")
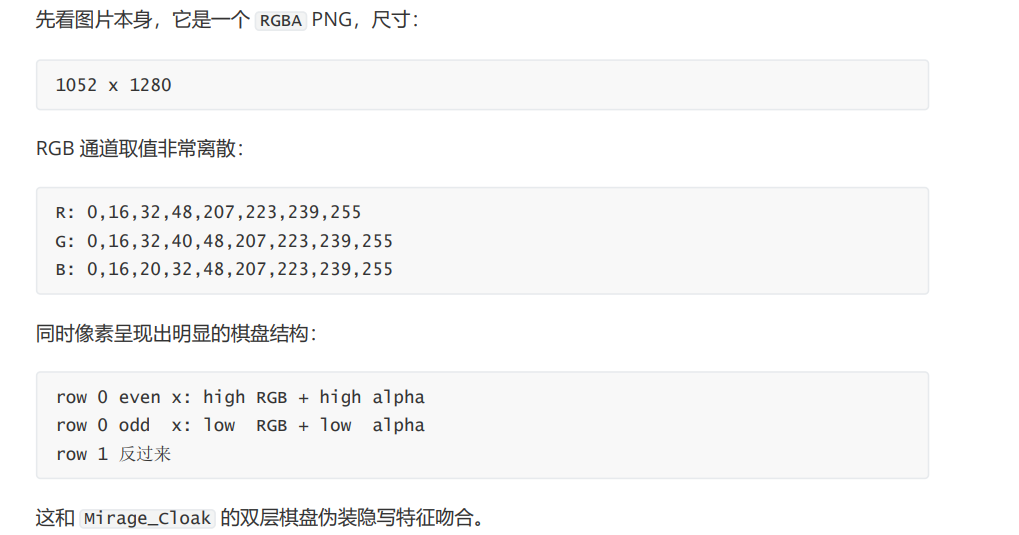
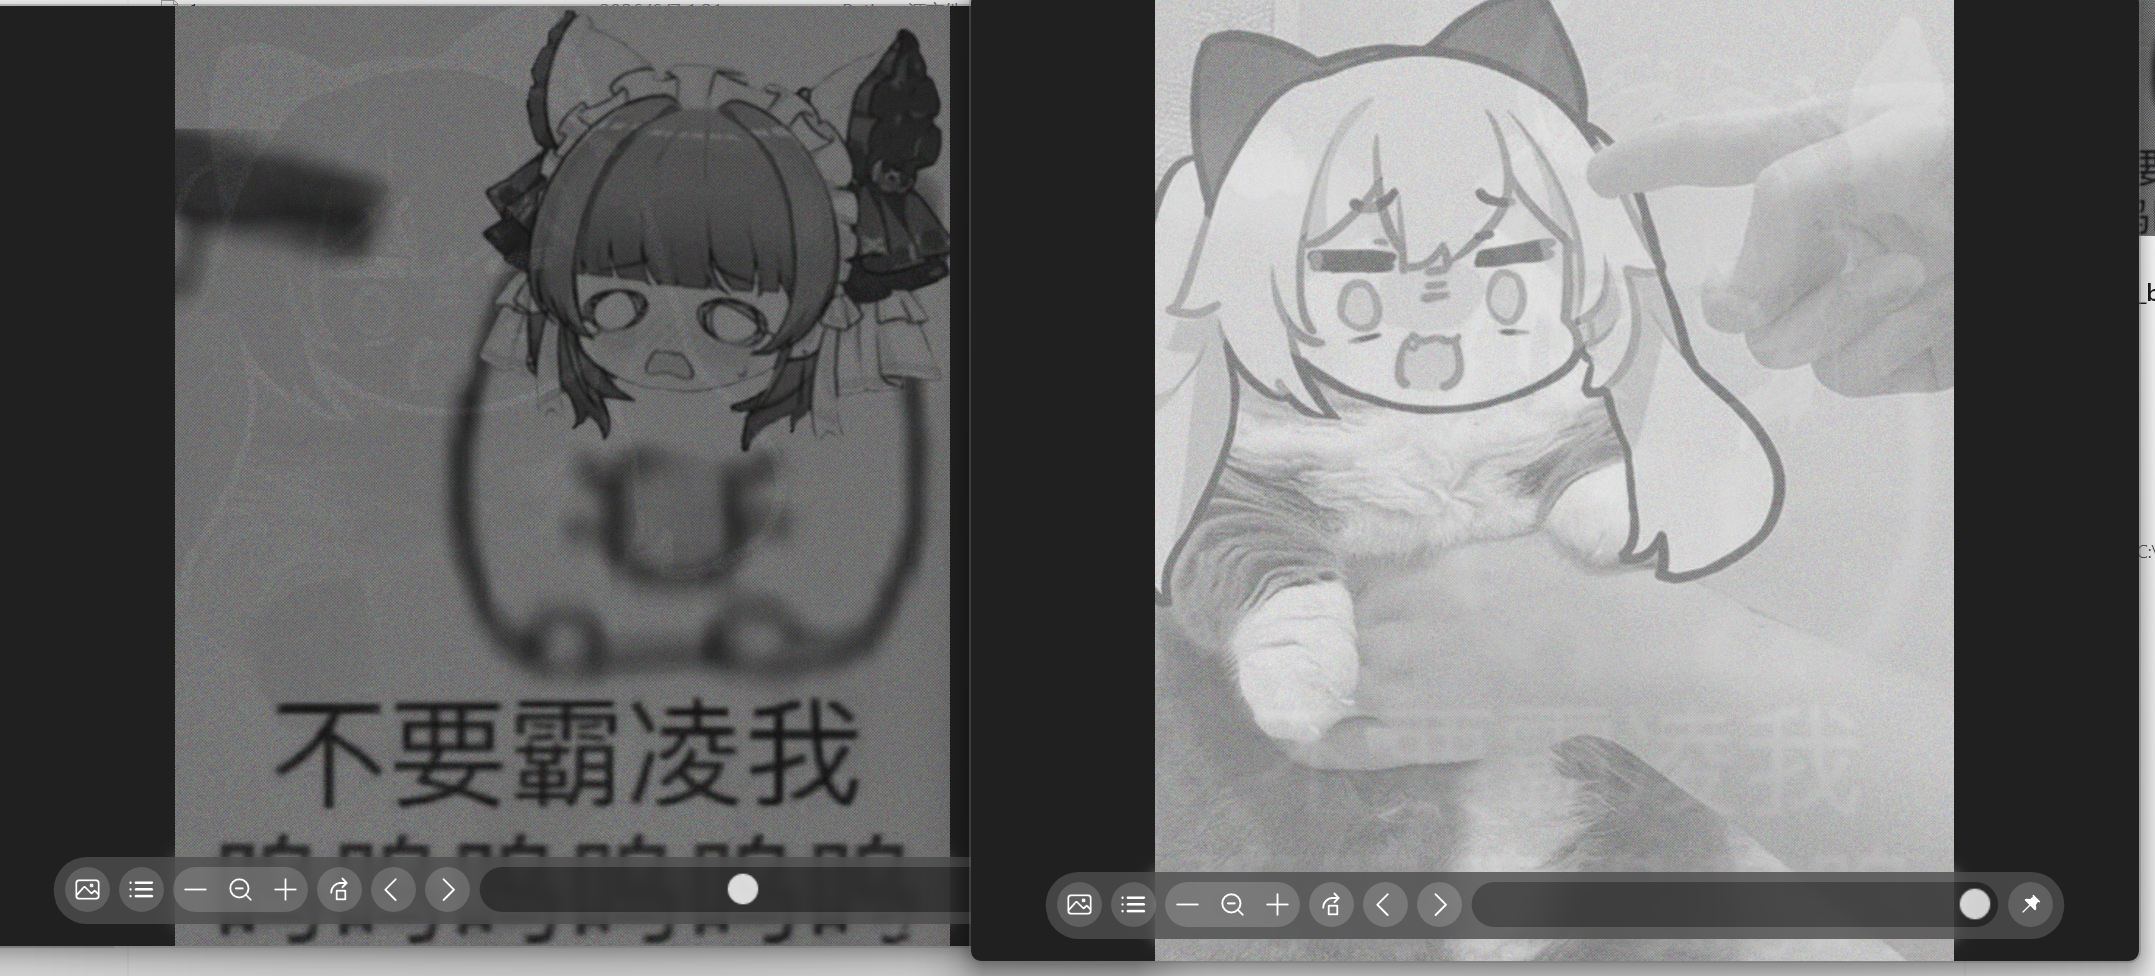
黑底、白底下能看到两层不同内容:黑底偏向第一层图和文字,白底偏向另一层人物图。这说明它确实不是普通单层图片,而是通过透明度和棋盘纹理伪装出的“幻影坦克”图。
把 alpha 通道拉伸出来,也能看到两层图像叠在一起:(直接用透明度通道也可以)
Mirage_Cloak v2 解码,可以直接得到隐藏文本:
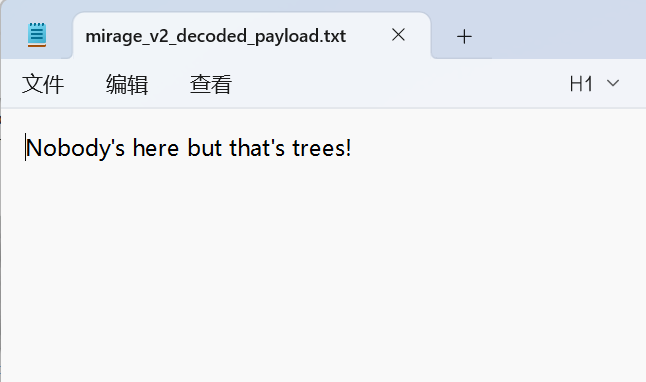
拿到:Nobody’s here but that’s trees!
四、VeraCrypt 容器(第二次)
仍然选择同一个 VeraCrypt 容器 盟军战车工厂 ,这次输入隐藏卷密码:
Nobody's here but that's trees!这次打开就是一个flag.png
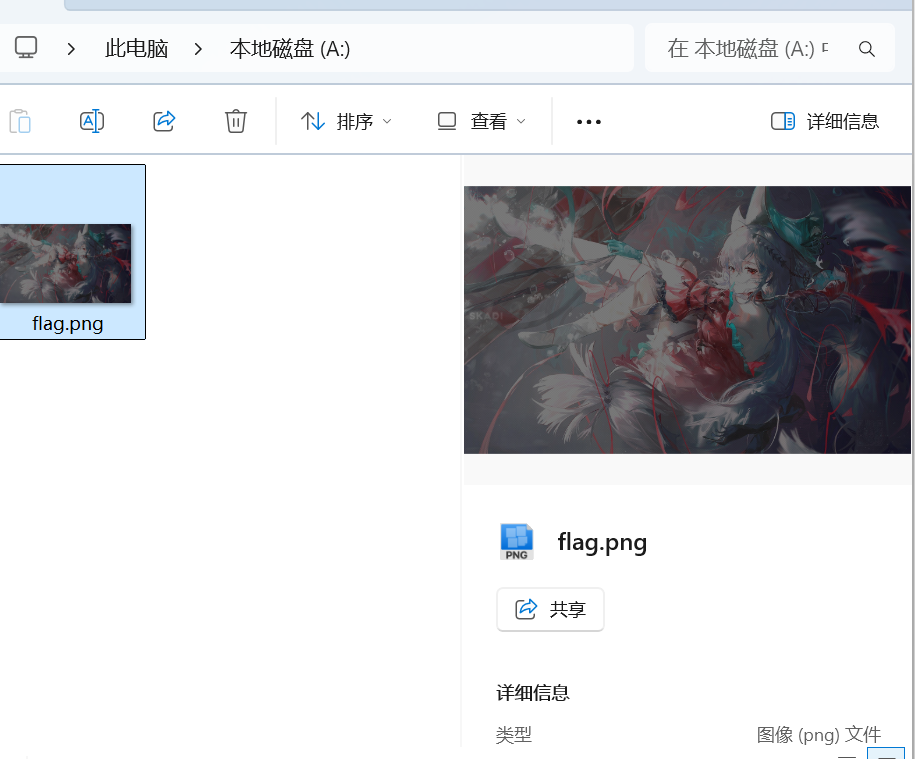
flag.png 右下角有二维码。(逆天)
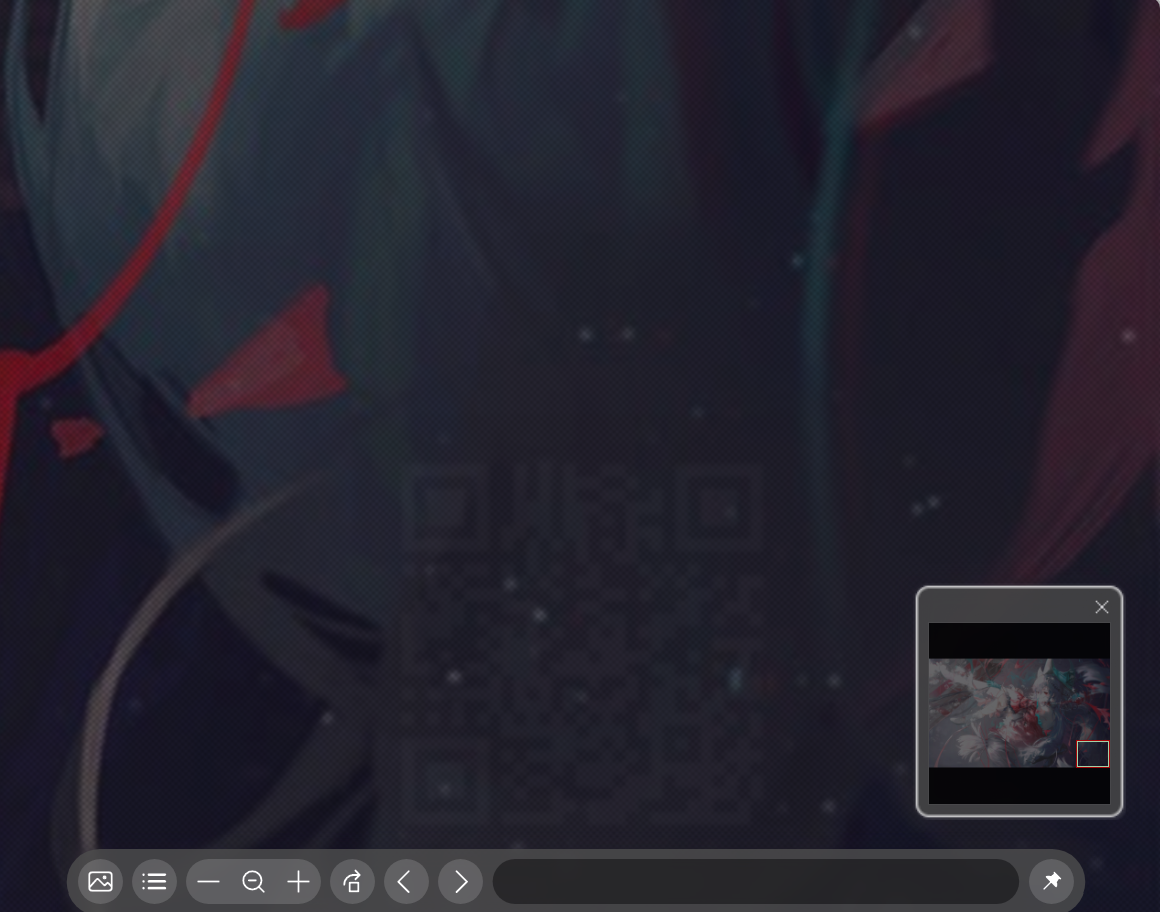
恢复的难点在于:QRCode表面有杂志,且图片有“织布”质感,图片非常暗(特别防AI)
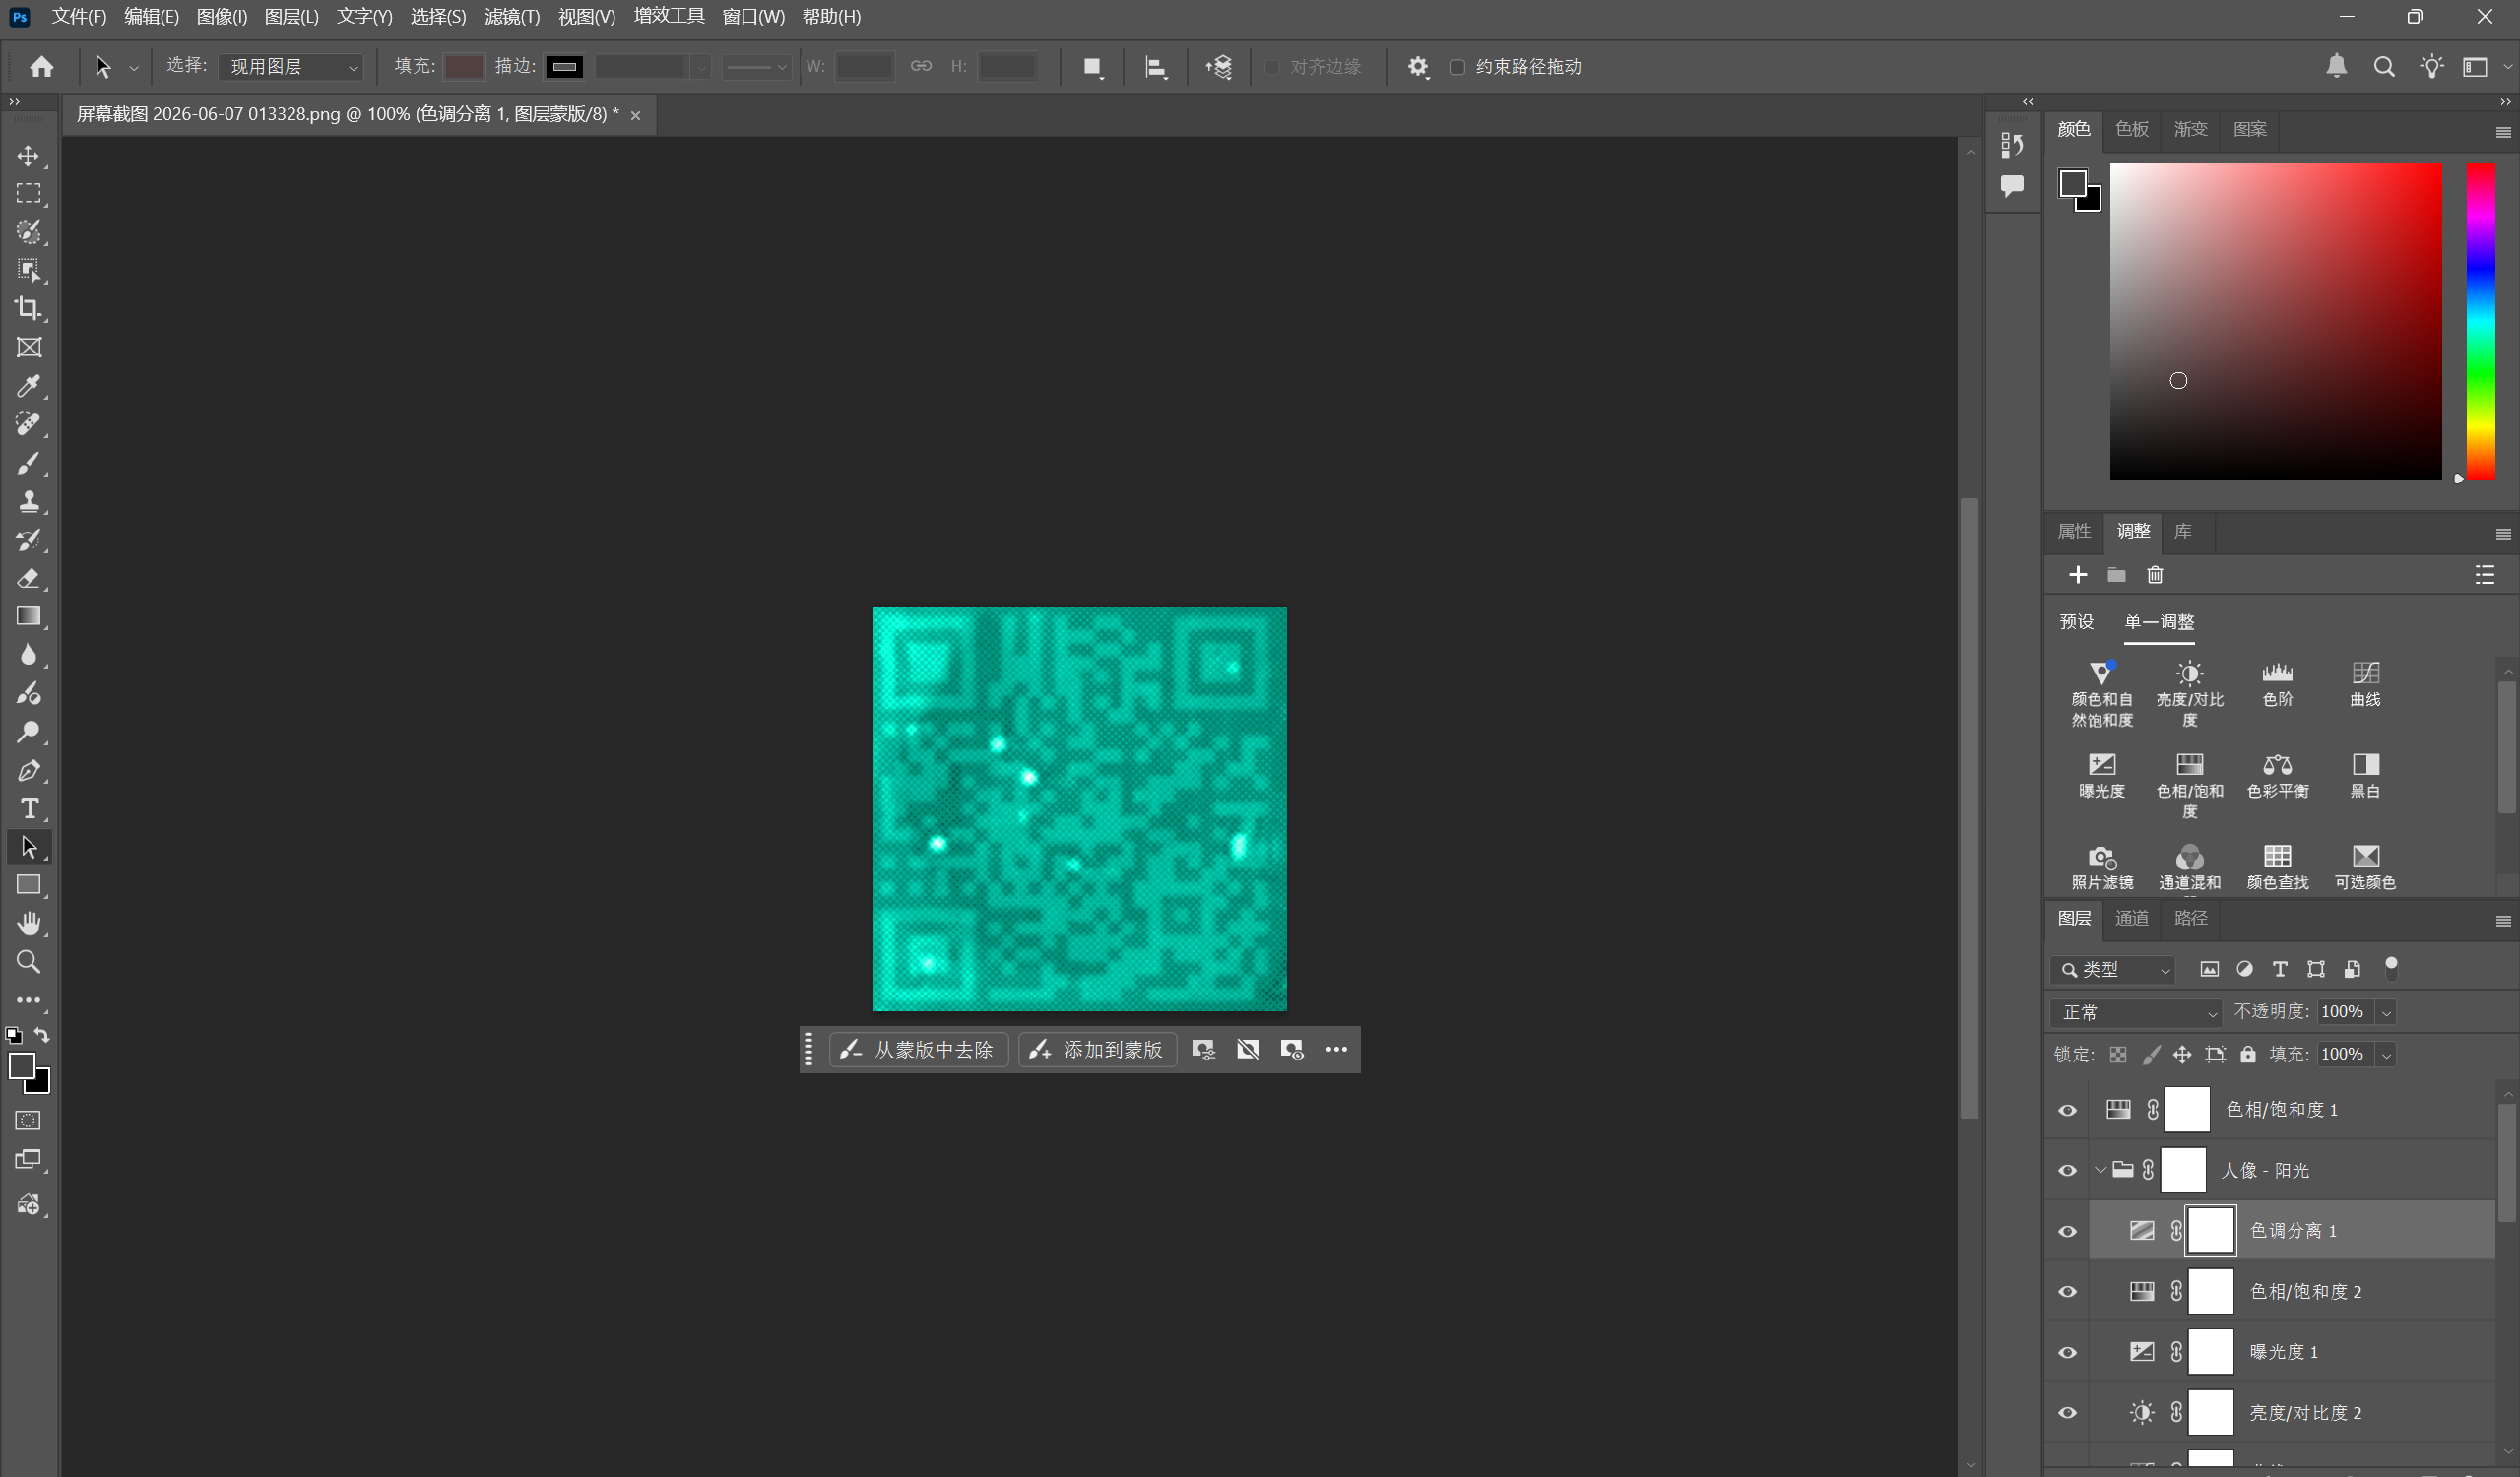
所以我们采用人工的方法:
用PS拉曝光度,拉对比度,拉亮度,可以看到大概
此时手机微信已经可以扫开了(微信里面有自动优化二维码的程序,夯)
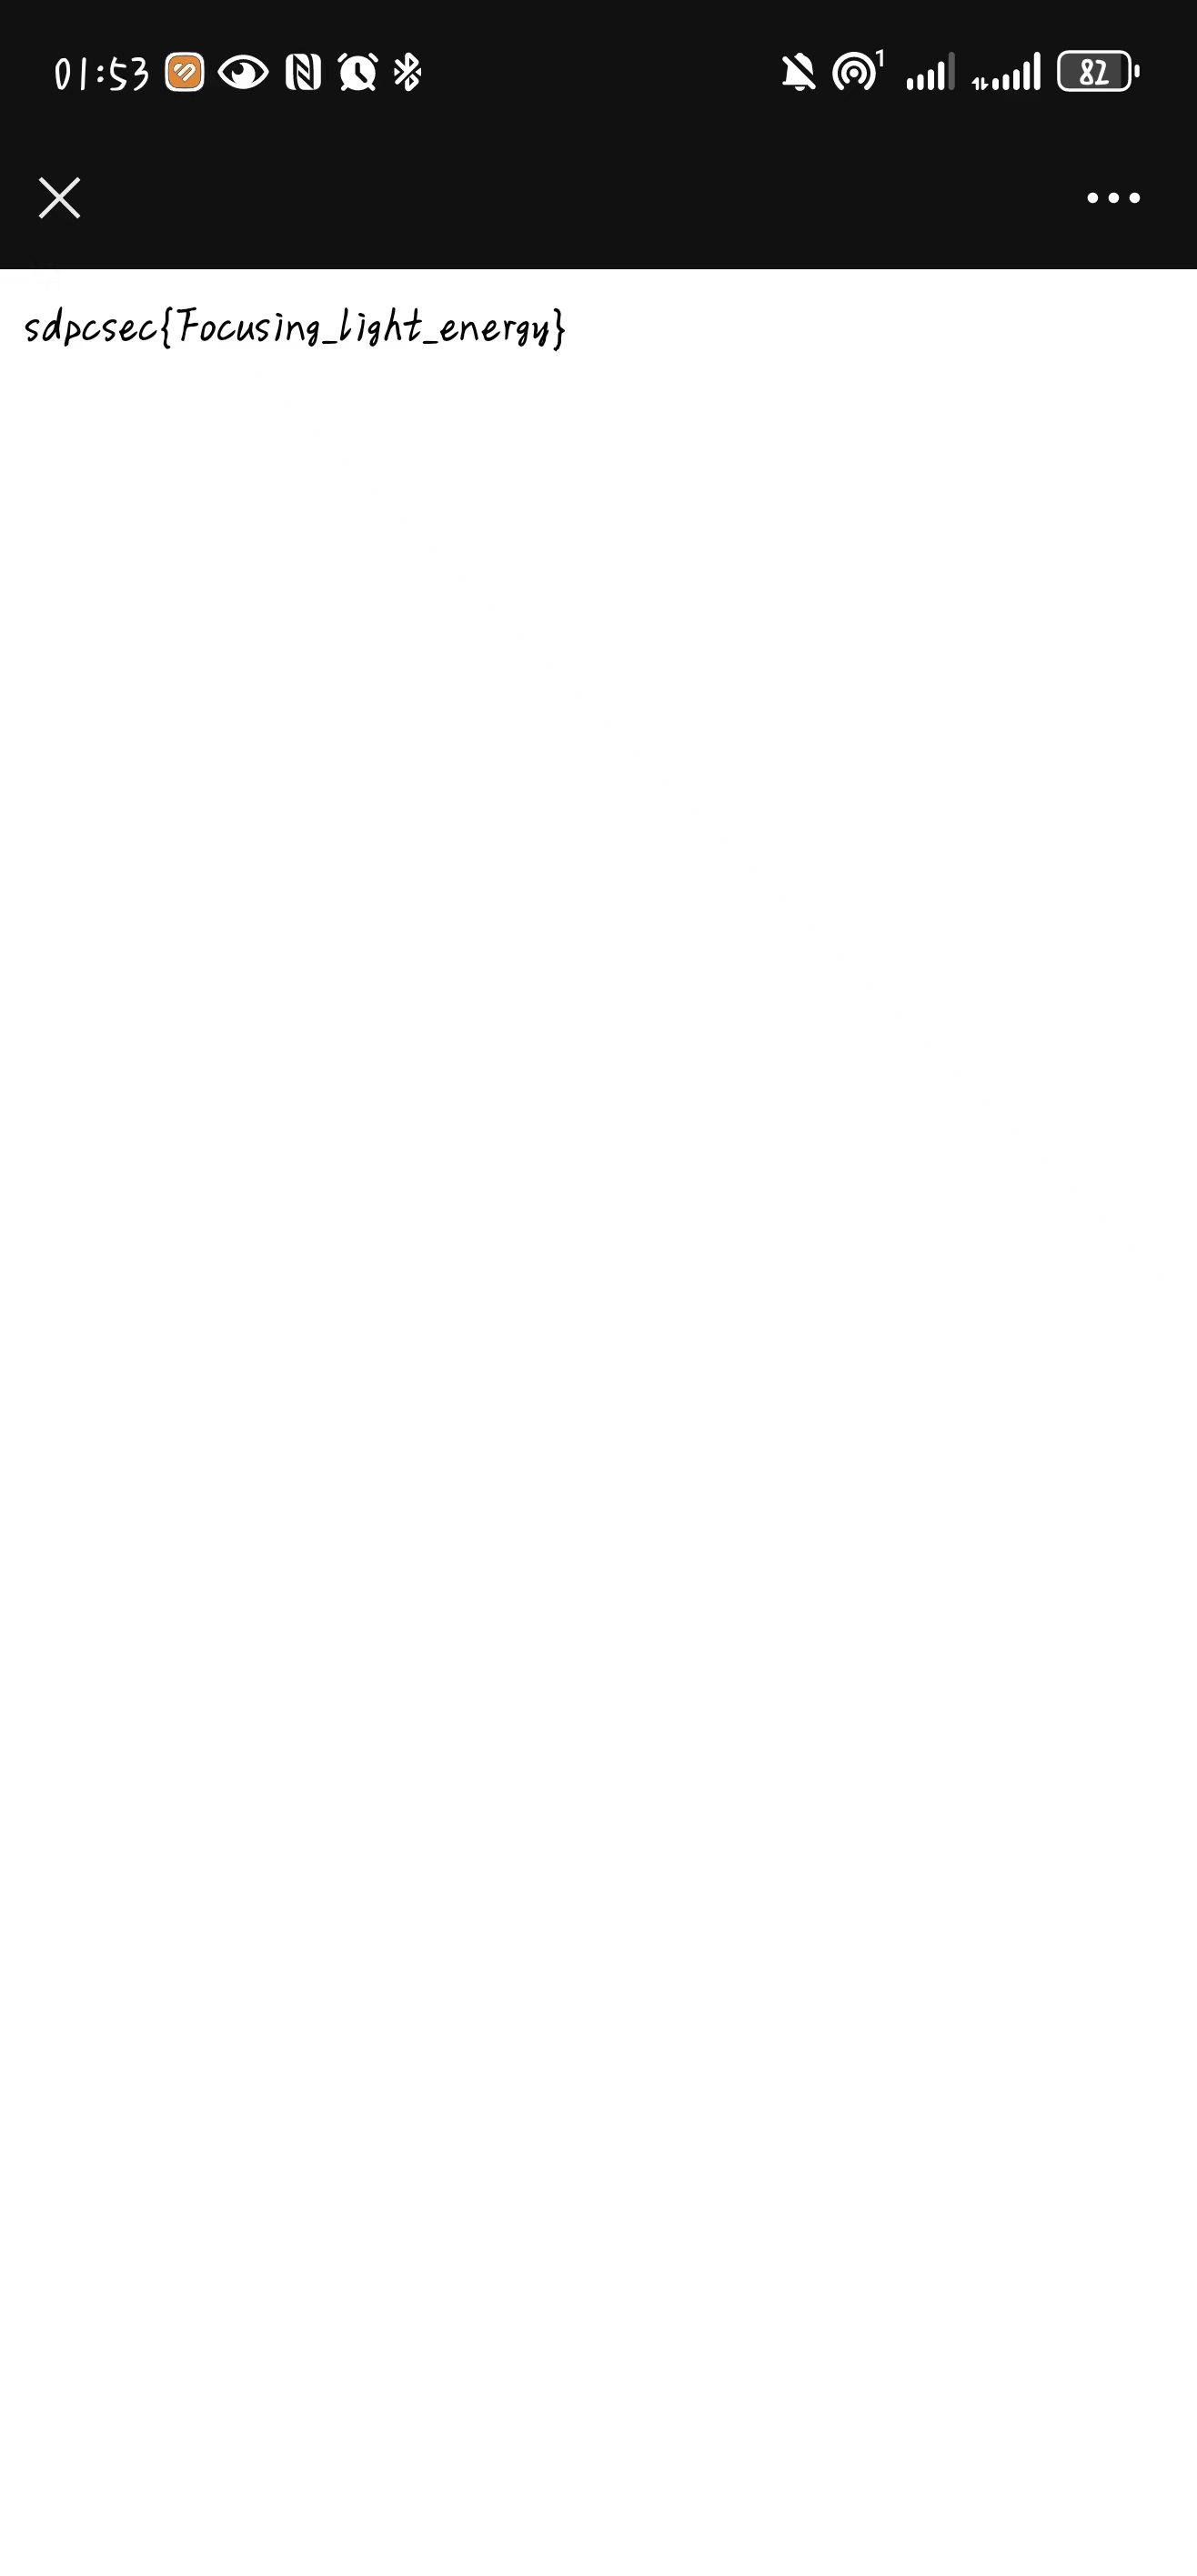
扫出来就可以拿到Flag:
sdpcsec{Focusing_light_energy}